

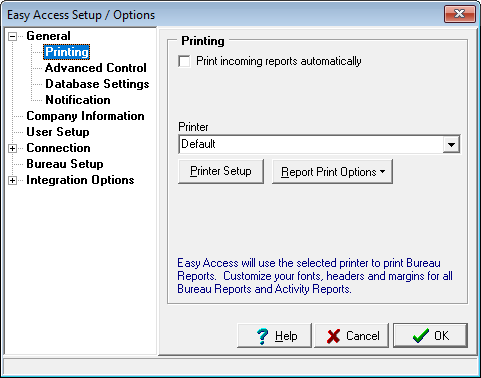
 Easy Access gives you total printing control. You can customize your fonts, headers, and margins easily for your Credit Reports and Activity Reports, or shut off printing altogether.
Print incoming reports automatically
If this option is selected, each credit report you receive will be sent directly to the printer. This is checked by default. If you do not check this option, make sure you have the Save Credit Reports checked in Database Settings. Otherwise, you will not be able to print out or view the report once it is retrieved from the credit bureau!
(Professional and Enterprise feature)
If you are acting as the connection server, checking this option will send reports to each workstation as they are received.
Print incoming reports for the current user
This option will send your reports to your printer once they have been received. If you have a connection server setup, your workstation will be notified that there are reports that need to be printed and they will be sent to your printer by the connection server.
Print incoming reports
Only the connection server can select this option. If you choose, you can have your connection server print all reports to its own printer.
Printer
This drop-down list displays all of the printer drivers currently installed in Windows. You can choose your Default printer or select another one from this list. This will be the printer that Easy Access will try to use throughout the program. While connected to the credit bureau, if you have the Print all incoming reports automatically option selected, you are not given a choice of what printer you would like to use before the printing starts. Easy Access will use the printer selected here.
Printer Setup
This button opens a Print Setup dialog box where you can adjust the properties of your printer. You can change paper size and source as well as page orientation.
When printing from the Letter Merge or from the Stored Reports screen, you will be given a choice of printers. For more information on Letter Merge or the Stored Reports, please see the appropriate sections.
If you would like to reprint a credit report using a different printer than your default printer, you may print the report from Stored Reports as long as you have selected Save Credit Reports in the Setup Options/Storage tab. Easy Access can only reprint reports which have been saved in its Reports database.
Report Print Options
This button will let you customize your fonts, headers, and margins for the Credit Reports and Activity Reports. Just click on the Report Print Options button, and choose which report you would like to customize. This will open the Report Options dialog box.
The following options can be adjusted from the Report Options dialog box. Note: Not all options are available for each report.
Custom Header
If checked, a header will appear on the first page of the report and a Customize Header button will appear.
Customize Header
This allows you to customize the header that will be printed on the first page of the report. You can type in your own text here, or insert Merge Fields into the header. For more information on Customizing Headers and using Merge Fields, please see Using Merge Fields in the Letter Merge section.
Add Page # / Header
If this option is checked, each page of the report will be numbered and a small one-line page header will be added to each page. This is helpful if you are printing batches of reports.
Page Margins
This will let you change the left, right, top, and bottom margins of the report.
Report Font
This is the font that will be used for the body of the report.
Page # Font
This is the font that will be used for both the page numbers and page headers.
Preview
This will let you preview the changes that you have made by displaying a sample report using the fonts, headers, and page margins you have selected.